
Launch Service Desk User Guide
This guide provides an overview of how to access, navigate, and utilize the OpenClinica Support Portal to manage your technical requests and quickly find solutions.
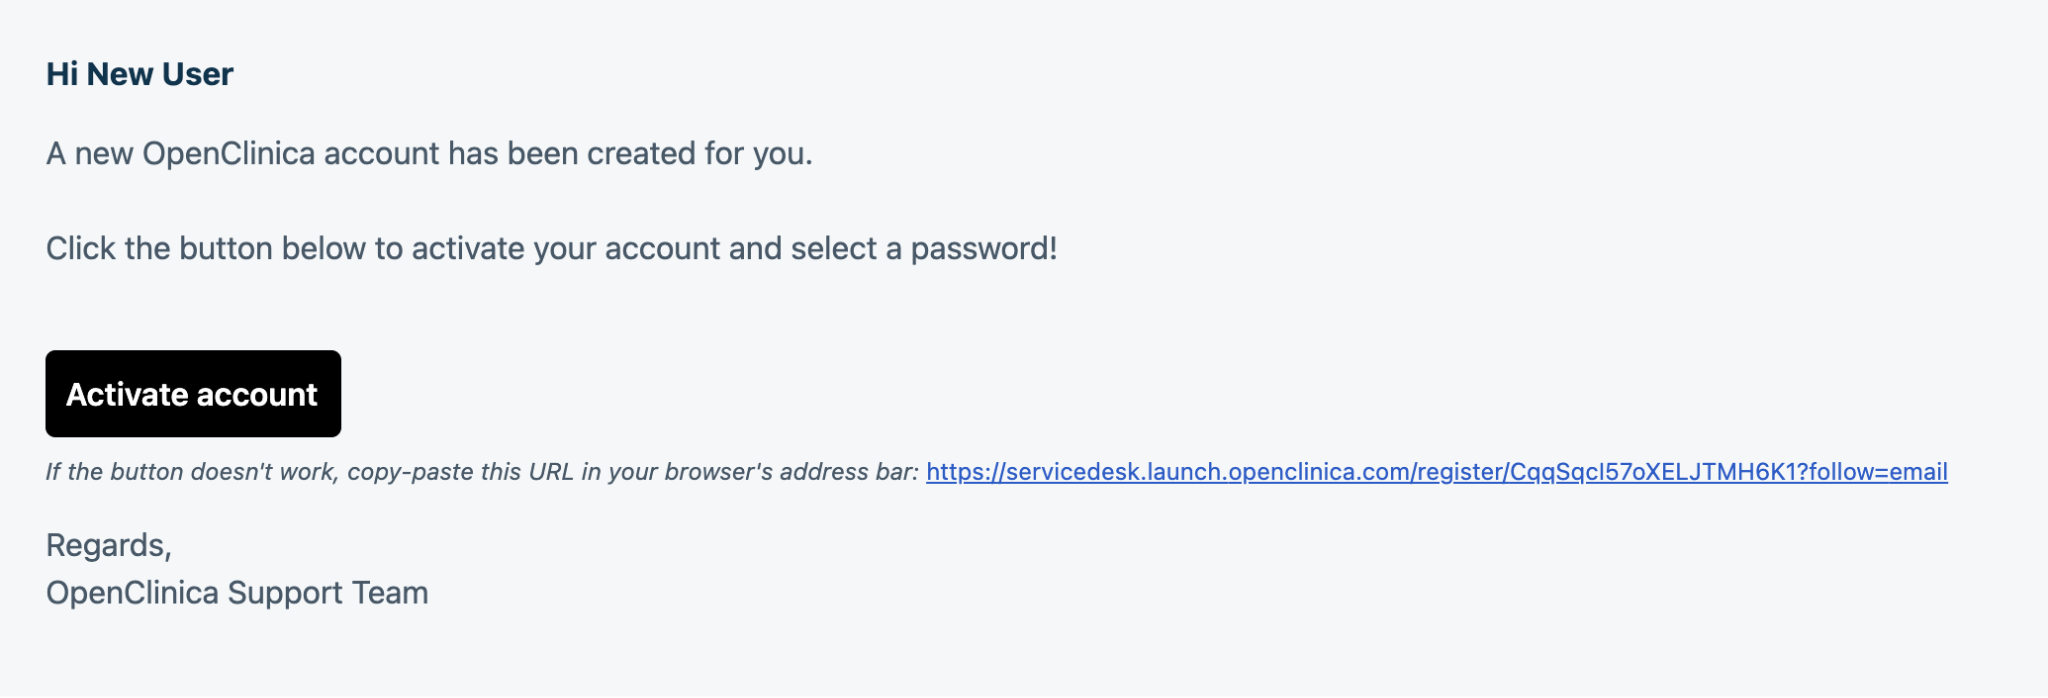
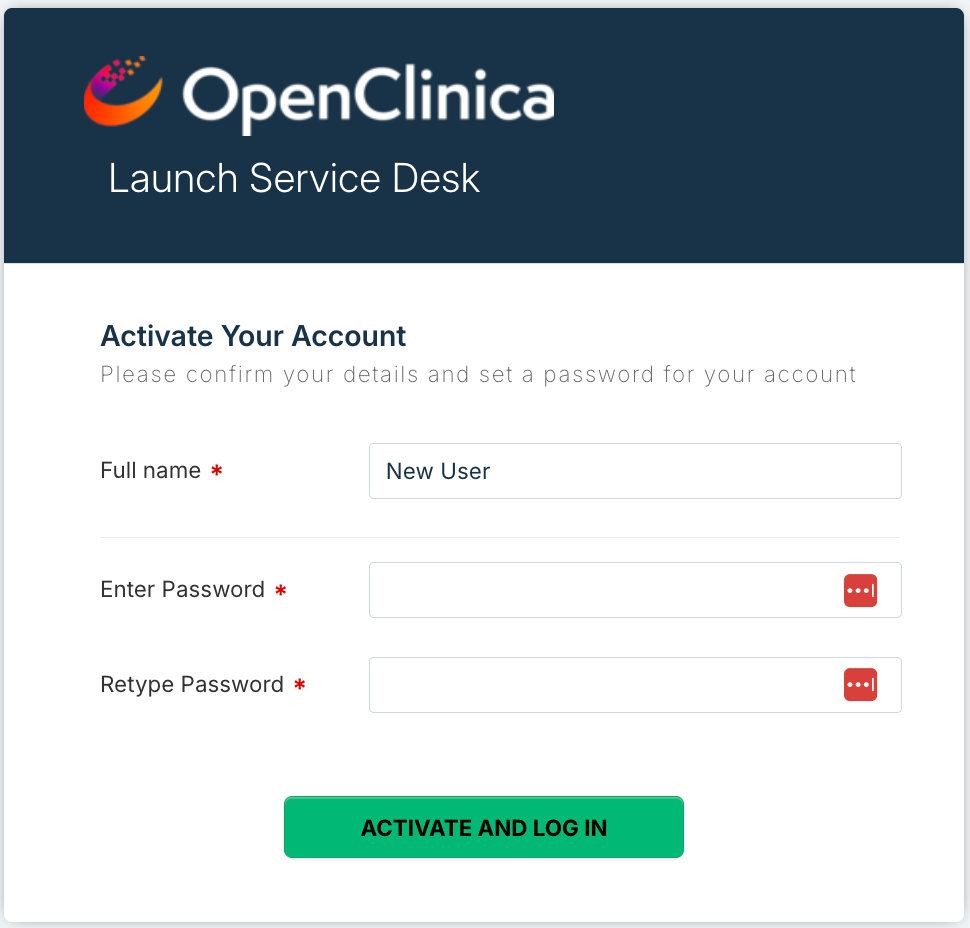
1a. Activate Your Account (First Time Access)
User Activation Email: You will receive a User Activation email when your account is created. Click the Activate account button or follow the link in the email to activate your account.
You’ll be prompted to set a password.
Once done, click the Activate and Login button. You’ll be taken to the Portal Home Page.
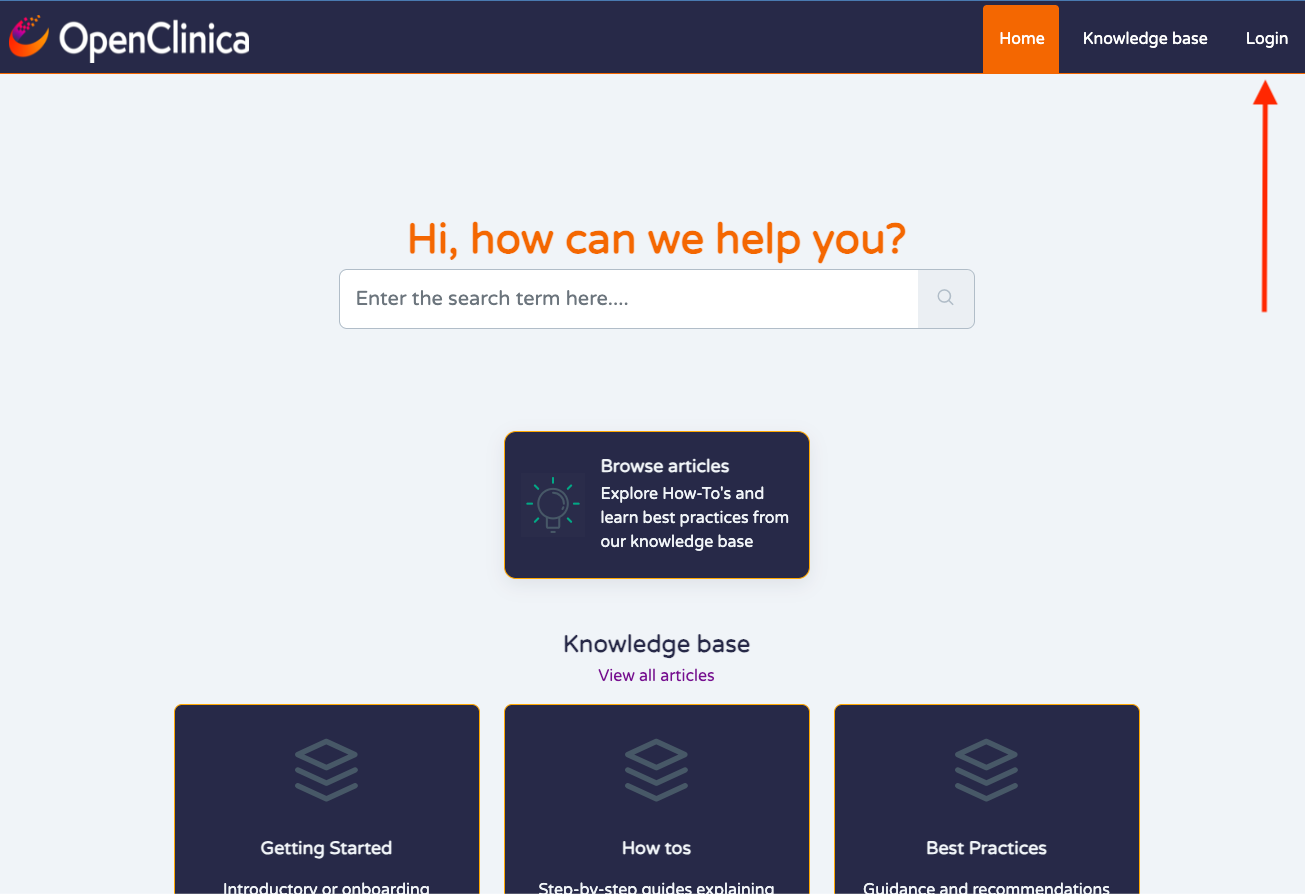
1b. Access the Portal
The Entry Point: Access the portal at https://servicedesk.launch.openclinica.com/support/home.
Pro-Tip: Use Ctrl+D (Windows) or Cmd+D (Mac) to bookmark this page immediately for rapid access.Authentication:
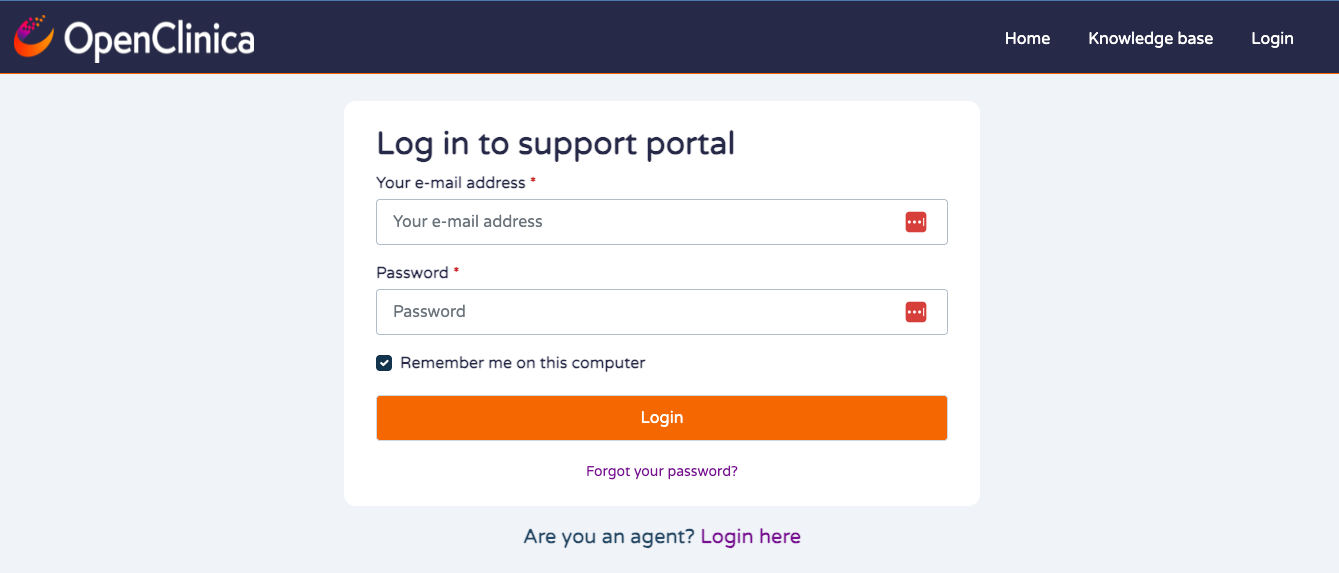
Click the Login button in the top right corner.
Users should typically sign in using their registered professional email address.
Technical Requirements: To ensure the portal functions correctly and to prevent "loading" errors, please use the latest versions of the following supported browsers:
Google Chrome (Recommended)
Mozilla Firefox
Microsoft Edge
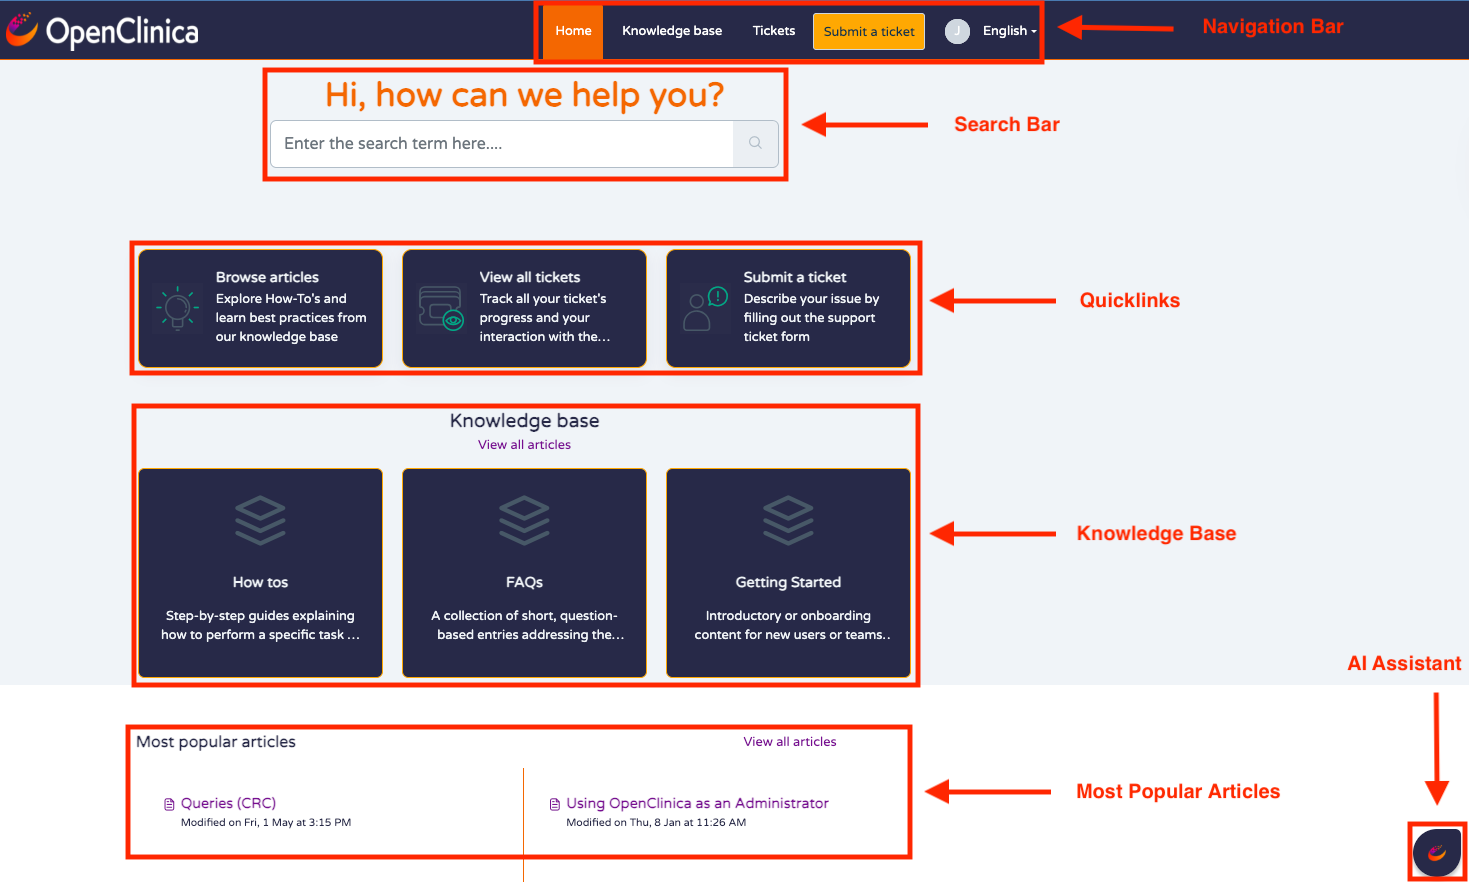
2. Navigate the Portal
Once logged in, the interface leads you directly to the most common tasks.
Navigation Bar: Use the top header to toggle between the Home screen, the Knowledge Base, your Tickets list, User Account settings, and Language settings.
Search Bar: The global search bar is your most powerful tool. It performs a simultaneous search across both the Knowledge Base (articles) and your Ticket History (past resolutions), ensuring you don't repeat work.
Quicklinks: The dashboard features tiles for "Browse Articles," "View All Tickets," and "Submit a Ticket" for one-click navigation.
Knowledge Base: Access a comprehensive repository of technical articles.
Most Popular Articles: Shows the most popular articles from the knowledge base.
AI Assistant: Access personalized support via the OpenClinica symbol in the bottom right corner of every screen.
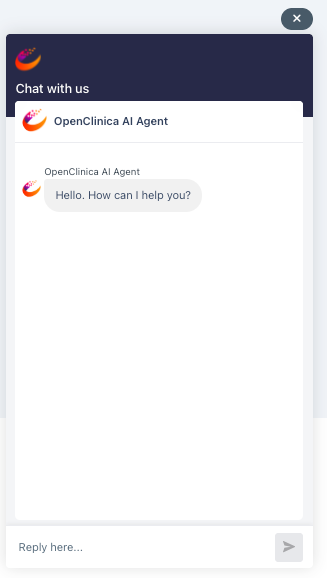
3. Find Answers Using the AI Assistant
The AI Assistant is your first stop for instant, personalized support. Unlike a standard search, the AI parses the entire Knowledge Base to synthesize a direct answer for you.
Tailored Solutions: Instead of reading through multiple Knowledge Base articles, ask a specific question like "How do I sign a form as an Investigator?" and the AI will provide a summarized step-by-step guide tailored to your query.
Contextual Awareness: The AI understands software-specific terms (e.g., Insight, Participate) and pulls only the most relevant data from the latest documentation.
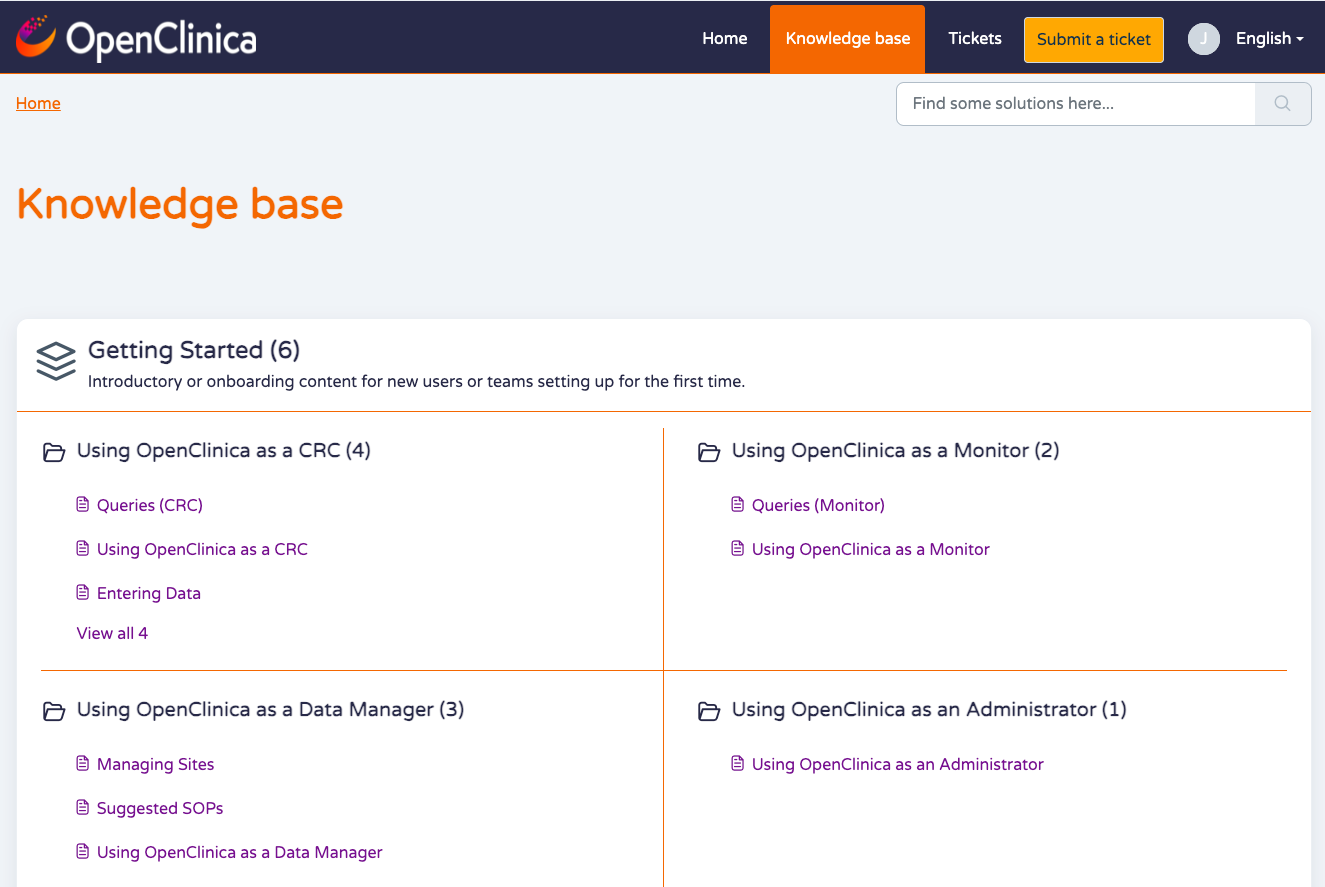
4. Find Answers Using the Knowledge Base
Use the Knowledge Base for deep-dives, official manuals, and browsing specific functional areas.
The Knowledge Base is grouped into Categories and Folders for easy navigation.
Category: High-level groupings like "Getting Started” or "Best Practices."
Folder: Specific functional areas, such as "Using OpenClinica as a CRC."
Keyword Strategy: For faster results, search using specific software terms such as: Insight, Participate, Randomize, CRC, Design, Query, or Sign.
Feedback Loop: If a Knowledge Base article is unclear or missing a critical step, please log a ticket so our team can update the documentation accordingly.
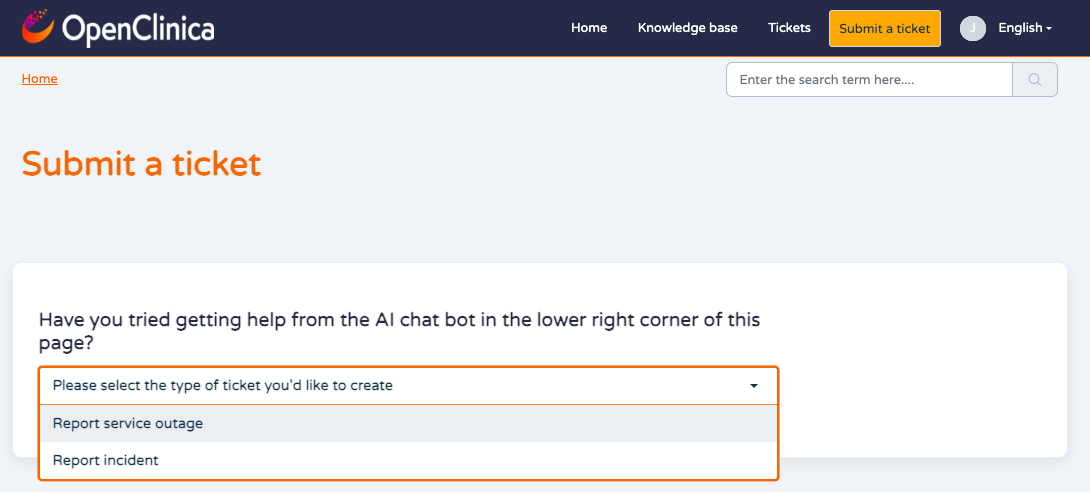
5. Submit a Ticket
If you cannot find a solution in the Knowledge Base or using the AI assistant, please submit a ticket request.
Select Ticket Type:
Report a Service Outage: Critical system-wide unavailability.
Report an Incident: An error or bug occurring in the software.
Required Fields are marked with an Asterisk*
Screenshots or short screen-recording clips are the fastest way to get a resolution. You can attach them using the Attachments button.
Tips:
As you type the description for the ticket, you will see related Knowledge Base articles popup on the right based on keywords.
Writing a Great Description. To resolve your issue faster, please include:
The Action: What were you doing when the error occurred?
The Error: Provide the exact error message text.
The Impact: Can you still work? (e.g., "I cannot export, but I can still enter data").
Visuals: Attach screenshots or screen recordings using the "Attachments" field.
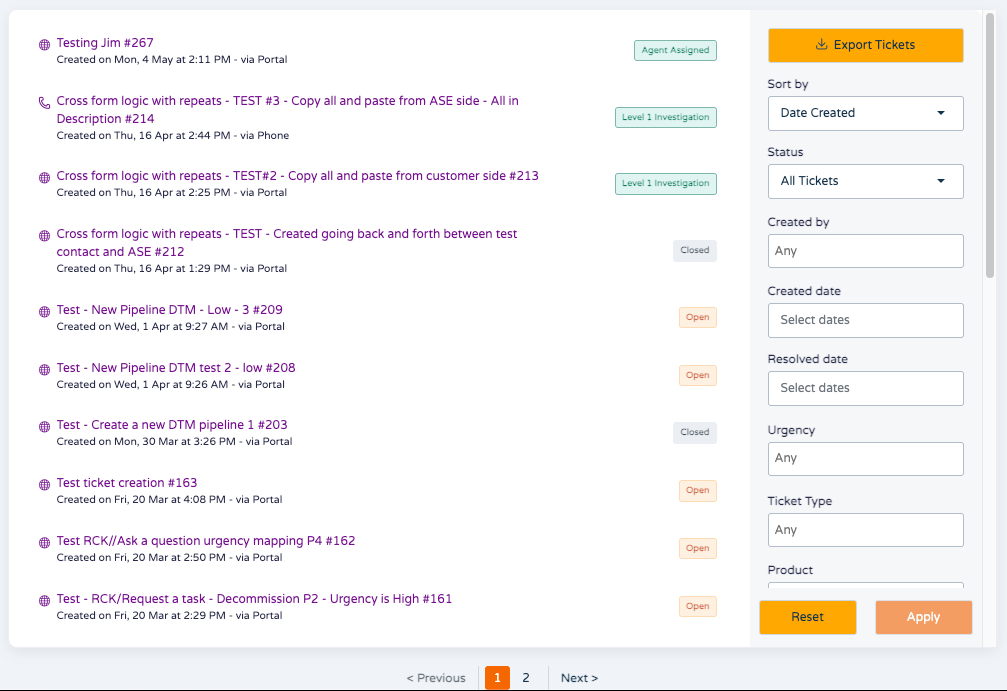
6. View and Filter Tickets
Monitor the progress of your ticket via the "Tickets" tab. You can use the Search Tickets bar to find specific requests or use Filters such as:
Status (Open, Pending, Resolved)
Created/Resolved Date
Urgency
Product and Ticket Type
You can then sort those tickets by Date Created, Last Modified or Status.
You can also use the Export button to download a CSV of your ticket history for internal reporting.
If you have multiple pages of tickets, you can navigate using the page buttons at the bottom.
To view a single ticket, simply click on the title of the ticket in the list.
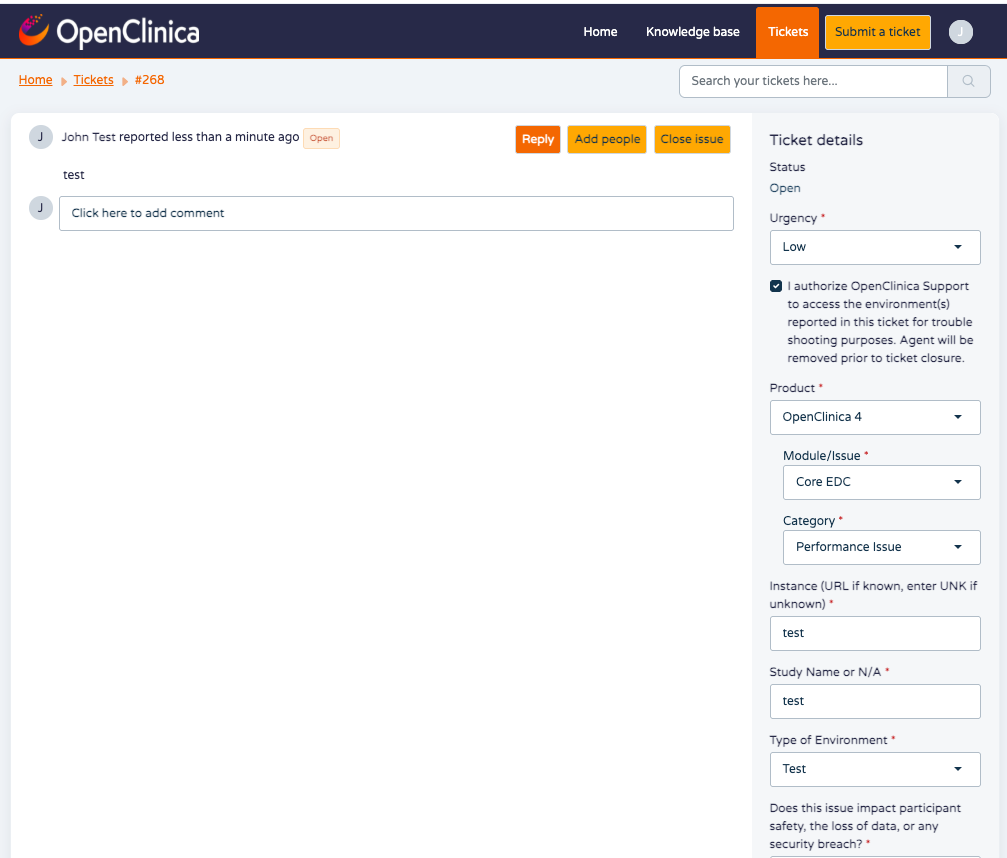
7. Update and Close Tickets
Once in the ticket, you will see the ticket comments on the left hand side and the ticket details on the right.
Comments: Add a comment by typing in the comment box or clicking the Reply button.
Update Details: Update ticket details by changing the values for the Urgency, Task or Requested Date of Completion fields, then clicking the Update button at the bottom.
Add People: Add people to the ticket by clicking the Add people button.
Email Notifications: You will receive an email when an agent replies. While you can reply via email, we recommend clicking the link in the notification to respond via the portal to ensure attachments and formatting are preserved.
Closing: Close the ticket by clicking the Close issue button.
Was this article helpful?
That’s Great!
Thank you for your feedback
Sorry! We couldn't be helpful
Thank you for your feedback
Feedback sent
We appreciate your effort and will try to fix the article